Example - Creating an L-Shaped Building in Simergy
Workspace: Buildings-Building/Floor/Zone
Definition-Create/Edit Bldg Stories
Workspace
Areas: Active
Project Model Tree - 3d
view - 2d view - Create/Edit
Geometry
Other
Examples -
If the user is creating new geometry from scratch or tracing over an
imported floor plan, they will engage the Geometry tab. To activate
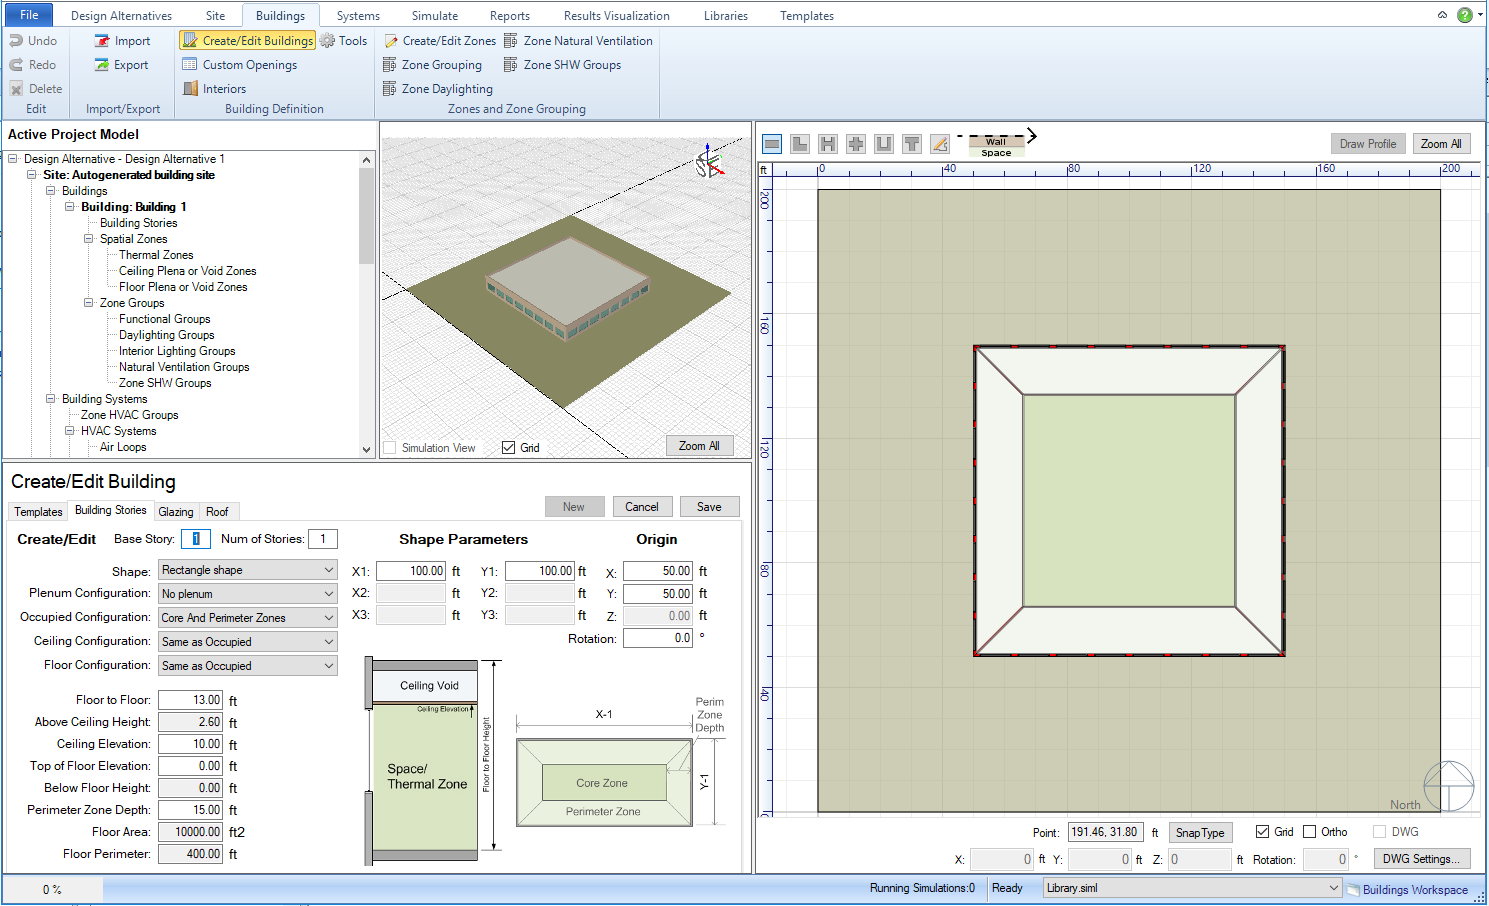
the workspace the user will need to select New, which causes:
- The Geometry work area to become active and default values for
a Rectangle Shape to appear in the different input cells
- The 3d view shows the default rectangle shape
- The 2d view shows the plan view (building canvas) of the default
rectangle shape and the shape icons on the upper left of the canvas
have become active.

The first decision to make is the type of shape to draw, and the options
can be accessed from either:
- the Shape drop-down list within the geometry workspace area
- the Shape icons on the upper left of the 2d view (building canvas)
By selecting different shape options (rectangle, L-Shape, H-shape, Cross
Shape, U-Shape, or T-Shape) the 3d view and 2d view will update to show
the current selection. If the user wants to draw a custom shape
they can do so by selecting either the icon of the pencil with a squiggly
line shown on the 2d view or by selecting 'Free Form' from the drop down
list.
To describe the Geometry Capabilities a set of examples will be utilized.
The user is encouraged to build these examples in parallel and the
end result is included at the end of the example.
Example 1: L-Shape Building
The following workflow goes through the steps to create a building form
using the L-Shape Shape selection:
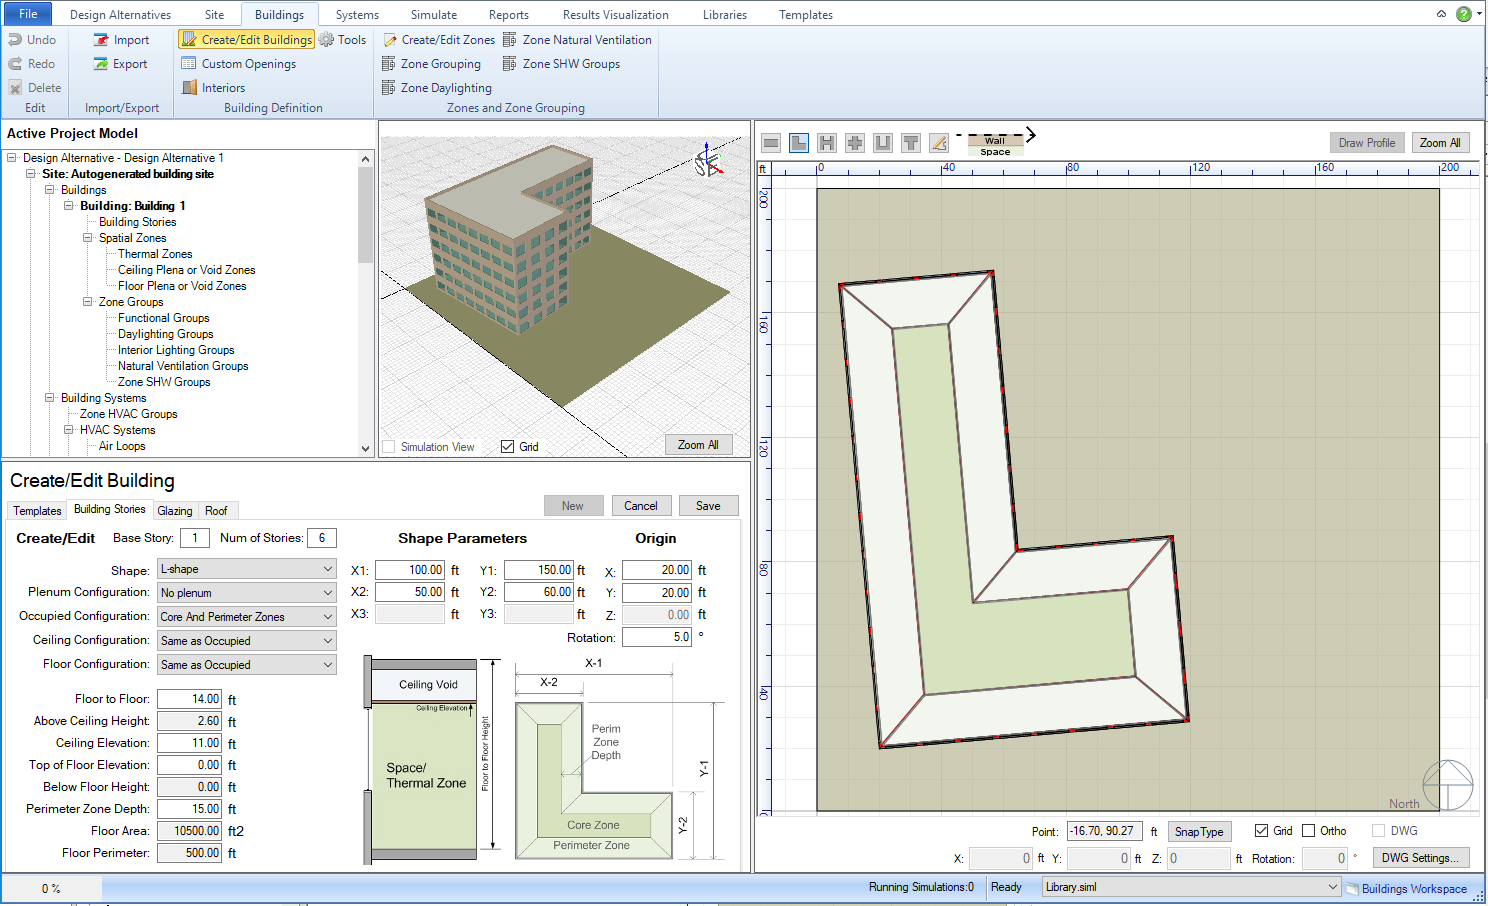
- The user has decided on an L-Shaped building, which is selected
from the Shape drop-down list.
- The Building Name is entered on the upper right of the work area
- Base Story remains at the default of 1
- The building is to be six (6) stories tall, so Num of Floors =
6 (Note: when the user selects elsewhere, completing the entry, the
3d view updates to show a six story mass
- The building is to be inset on the site by 20' on both sides, so
the x-value is changed to 20' and the y-value is changed to 20' as
well.
- The L-Shape will extend farther to the North, so Y1 = 150 ft.
- The L-Shape on the East is a bit deeper, so Y2 = 60 ft.
- Everybody loves the 5 degree skew, so the user has entered 5 degrees
for the rotation.
- The Zone Configuration is to be 'core and perimeter zones'
- The Plenum Configuration is to be 'above ceiling' (Note: when selected
the section diagram below updates to show a ceiling plenum)
- The floor to floor height is 14' (Note: the ceiling plenum height
increased, but it is in a gray cell, which means it cannot be edited)
- The ceiling elevation is 11' (Note: the ceiling plenum height adjusted
again, indicating that this is the other parameter influencing the
plenum height value)
- The top floor elevation will be kept at the default value (0.00
ft), which means that the overall building height will be determined
by the values input in the 'Floor to Floor' and 'Num of Floors'. The
building will be 84' tall (6 stories x 14 ft floor to floor)
- The perimeter zone depth will remain at 15'
- All of the other cells cannot be edited (shown in gray)

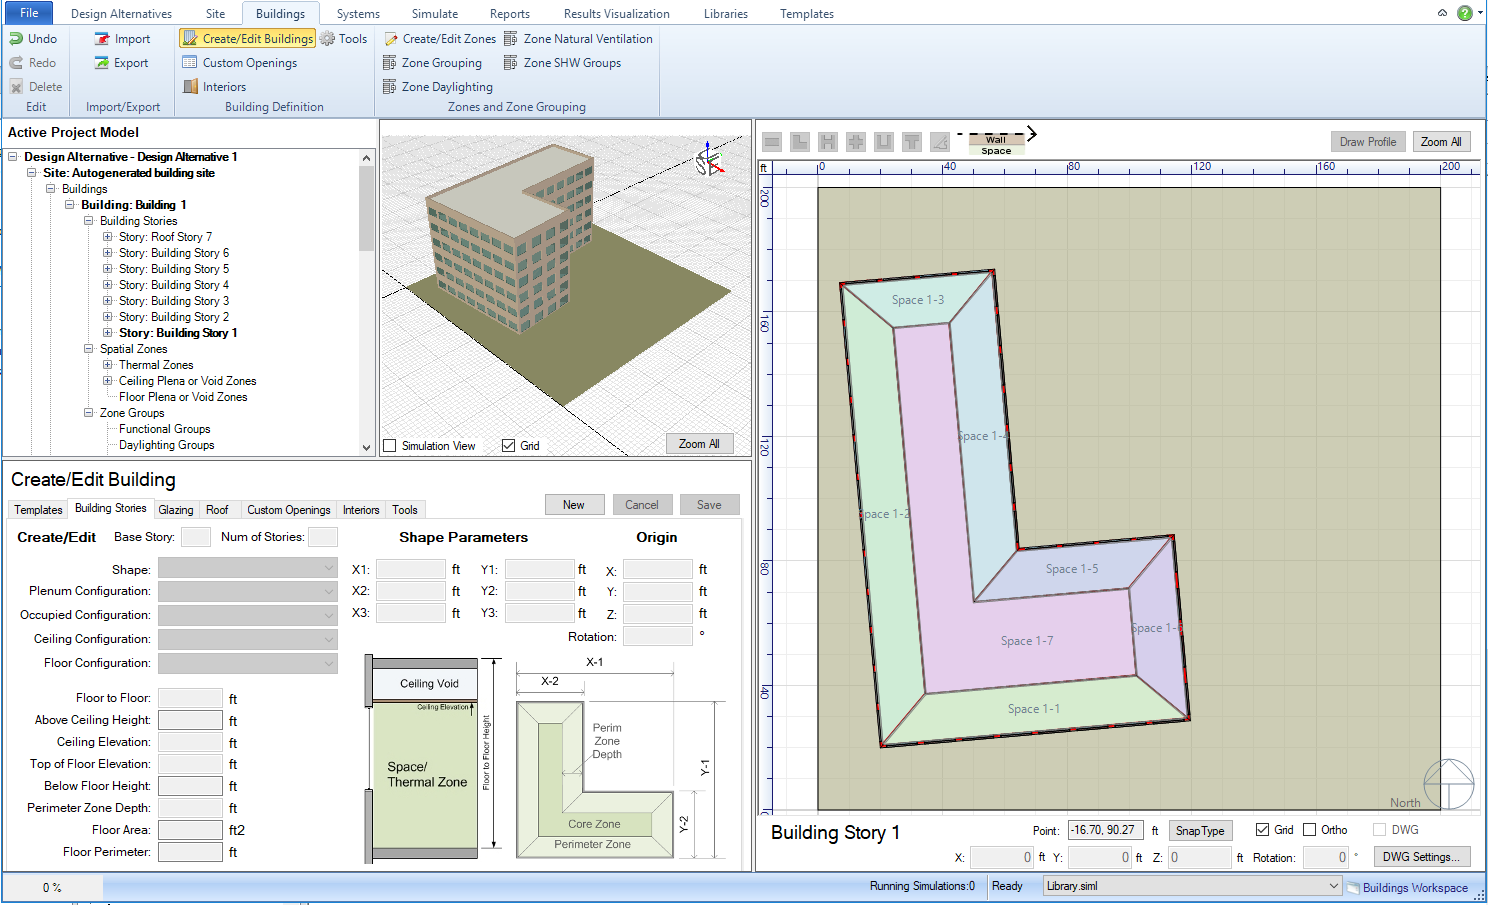
- The L-shaped building and it's associated inputs are not saved
until the user selects create.
- When create is selected the
following updates occur:
- The 2d-view shows the names of the different spaces, which
are different colors
- The project tree is updated to include the L-shaped extravaganza
- The geometry work area goes back to its default starting point

______________________________________________________________________________________
©
Copyright 2013 Simergy, Sustainable IQ, Inc.

