The workspace that provides you the ability to import IFC2x3, IDF and GBXML. This is where the BIM to BEM magic starts...
Tip: importing a DWG/DXF file into Simergy can be done from the 2d Building Canvas view in the Buildings tab.
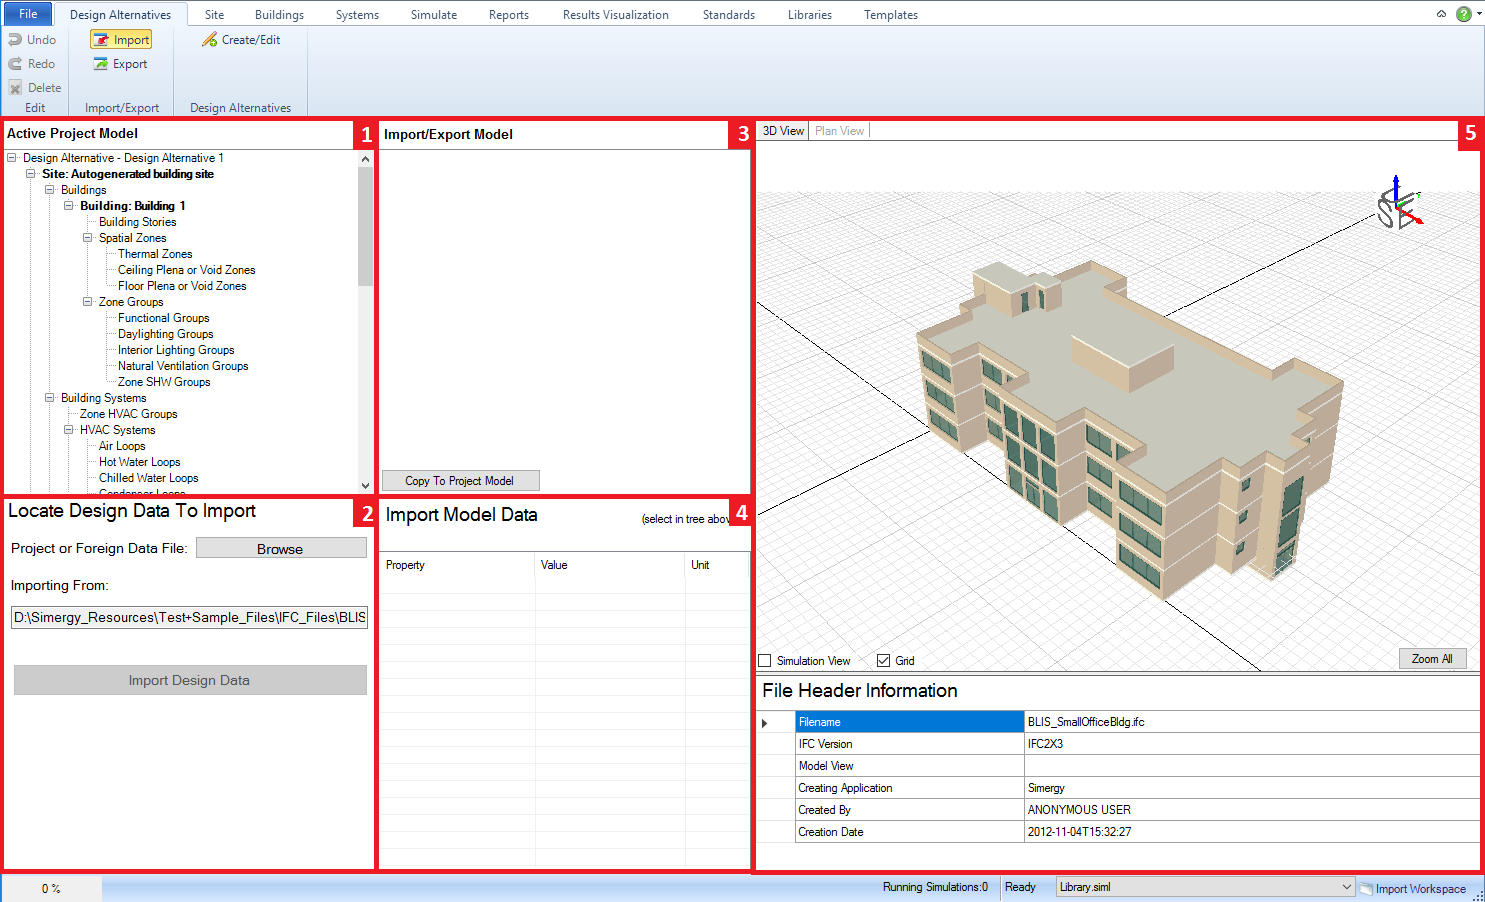
View of the Import Workspace with main work areas numbered:
Main workspace areas:
Selecting launches a browser that you can use to locate the desired file to Import
Once you have selected a file and closed the browser, the file path for the file will appear in this field.
Becomes active once a file for import has been selected. When you select the button it launches a three step Import Design Data process, which includes Converting Data, Creating References, and Transforming Data. When complete a "model imported successfully" message will appear.
Selecting this button launches the final step in the import process for all three of the file types (IFC2x3, IDF and GBXML).
The default import model view, which displays the imported geometry in 3d.
The checkbox allows you to display the space boundaries in 3d view for the imported model. Default is Simulation View = Off
The checkbox allows you to display the grid on the ground plane or not. Default is Grid = On.
Selecting the tab (top left of area) displays the first floor and the associated spaces for the imported model.
Allows you to zoom to the extents of the model in both the Plan View and the 3D View.
Provides basic file information for the Imported file. All of the fields are related to the Imported File itself, which may or may not contain information.
Note: All fields may not be filled in.
The name for the file that you selected to Import will automatically be filled in here.
Typically will only be populated for IFC files. Reminder: Only IFC2X3 files can be imported into Simergy
Typically will only be populated for IFC files. Reminder: Only IFC2X3 files can be imported into Simergy
The name of the application that the file was created in.
Provides the name of the author of the imported file.
Provides the timestep for when the imported file was created.
The workspace provides the user the ability to export a Simergy model in Industry Foundation Class (IFC) version 2.3 and Input Data File (IDF) formats.
View of the Import Workspace with main work areas numbered:
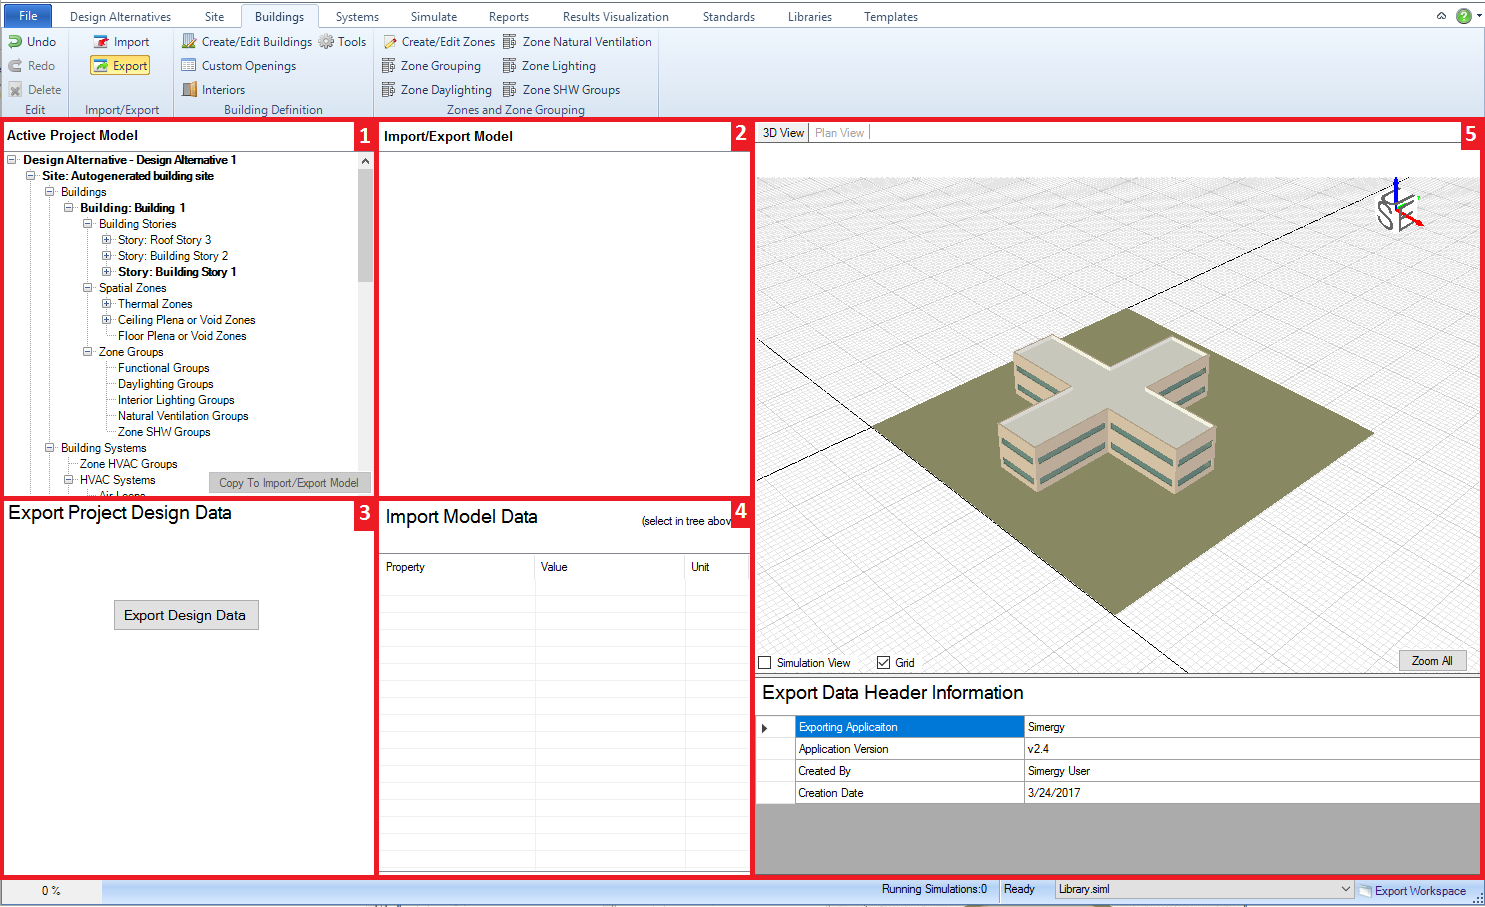
Main workspace areas:
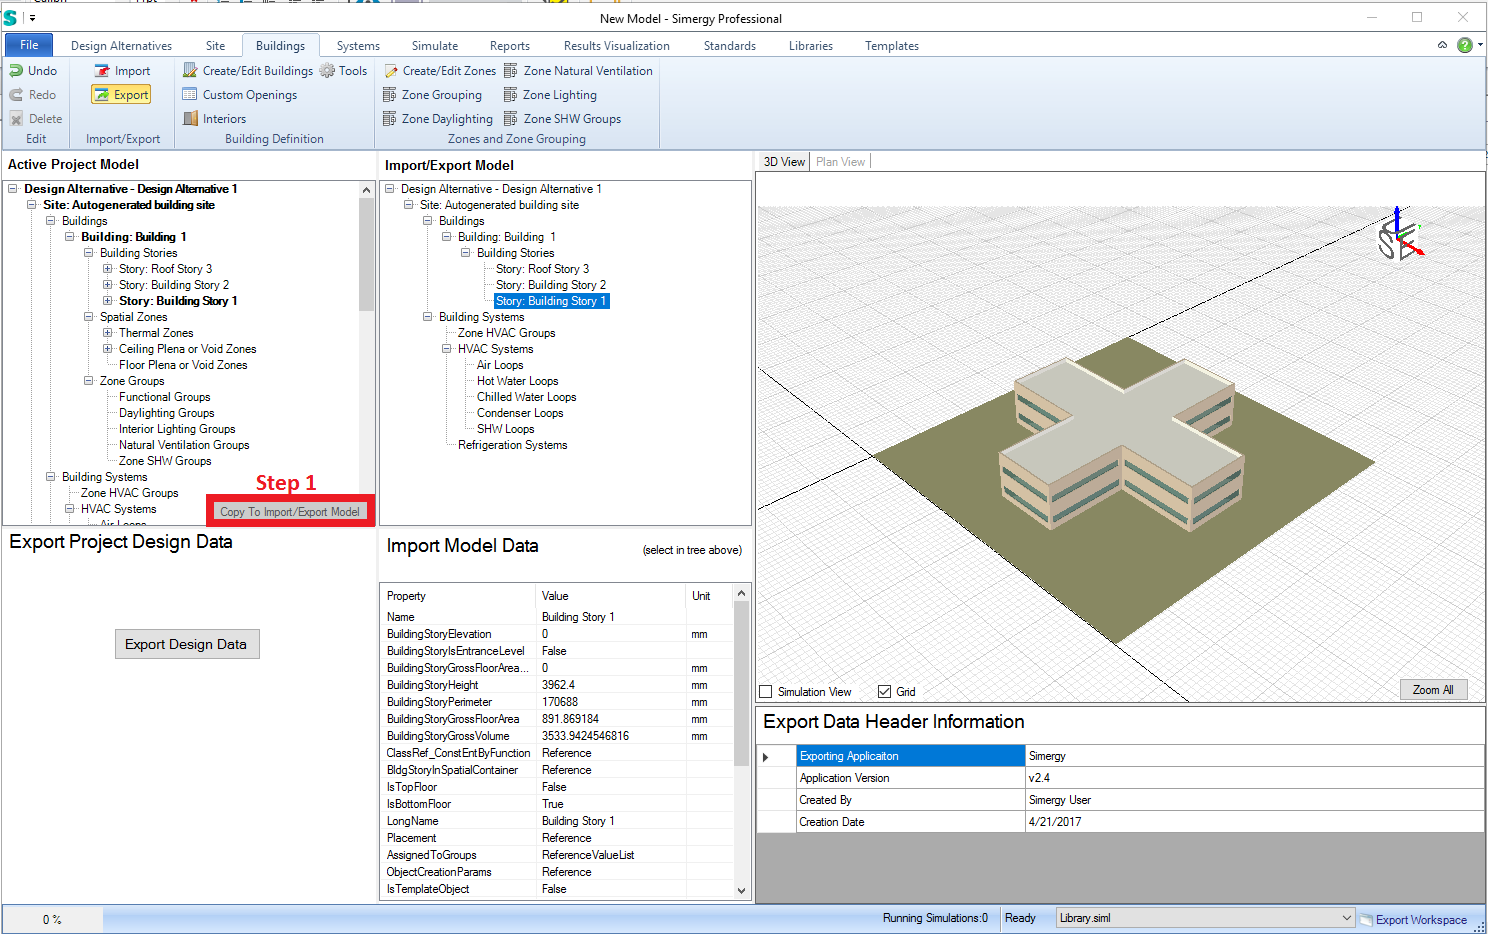
Export Model Step 1- The export process is initiated by the user selecting Copy to Import/Export Model, which populates the Import/Export Model field with a tree that can be used to interrogate the information included in the model, and a 3d view of the current model appears.
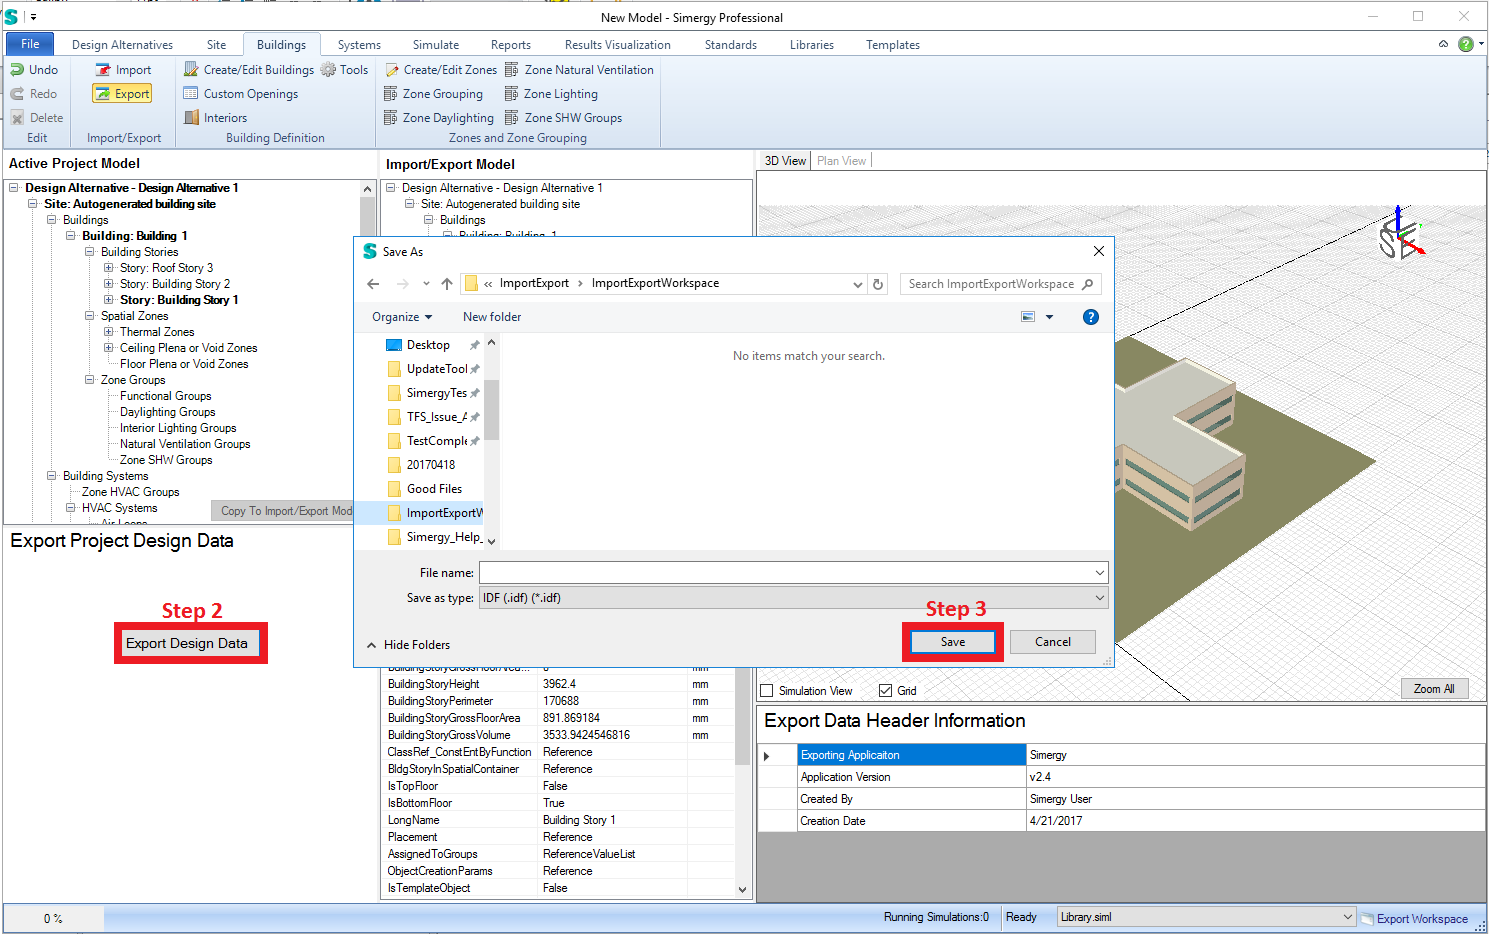
The file can be saved as one of three types:
IDF (.idf) [Default]
IFC2.3 (.ifc)
SIMP (.simp)
Export Model Step 3 - Once a location, filename and file type is specified, click Save
After the export process is complete, a dialog will appear stating that the process has been successfully completed
The default import model view, which displays the imported geometry in 3d.
The checkbox allows you to display the space boundaries in 3d view for the imported model. Default is Simulation View = Off
The checkbox allows you to display the grid on the ground plane or not. Default is Grid = On.
Selecting the tab (top left of area) displays the first floor and the associated spaces for the imported model.
Allows you to zoom to the extents of the model in both the Plan View and the 3D View.
Provides basic file information for the Imported file. All of the fields are related to the Imported File itself, which may or may not contain information. Note: All fields may not be filled in.
The name of the program that the file is being exported from. Simergy will always appear in this field.
The version of Simergy the file is being exported from.
Provides the name of the author of the exported file. Default = Simergy User
Provides the timestep for when the exported file was created. Example = 6/15/2017 2:08:02 PM
______________________________________________________________________________________
© Copyright 2013 Simergy, Sustainable IQ, Inc.