In the scenario where you are working with radiant floors and ceilings within a HVAC system design, there may be a need to assign a surface(s) to the energy output of a component, so that the BEM models the desired performance correctly.
To begin to describe how this can be done, let's revisit a few things to remember:
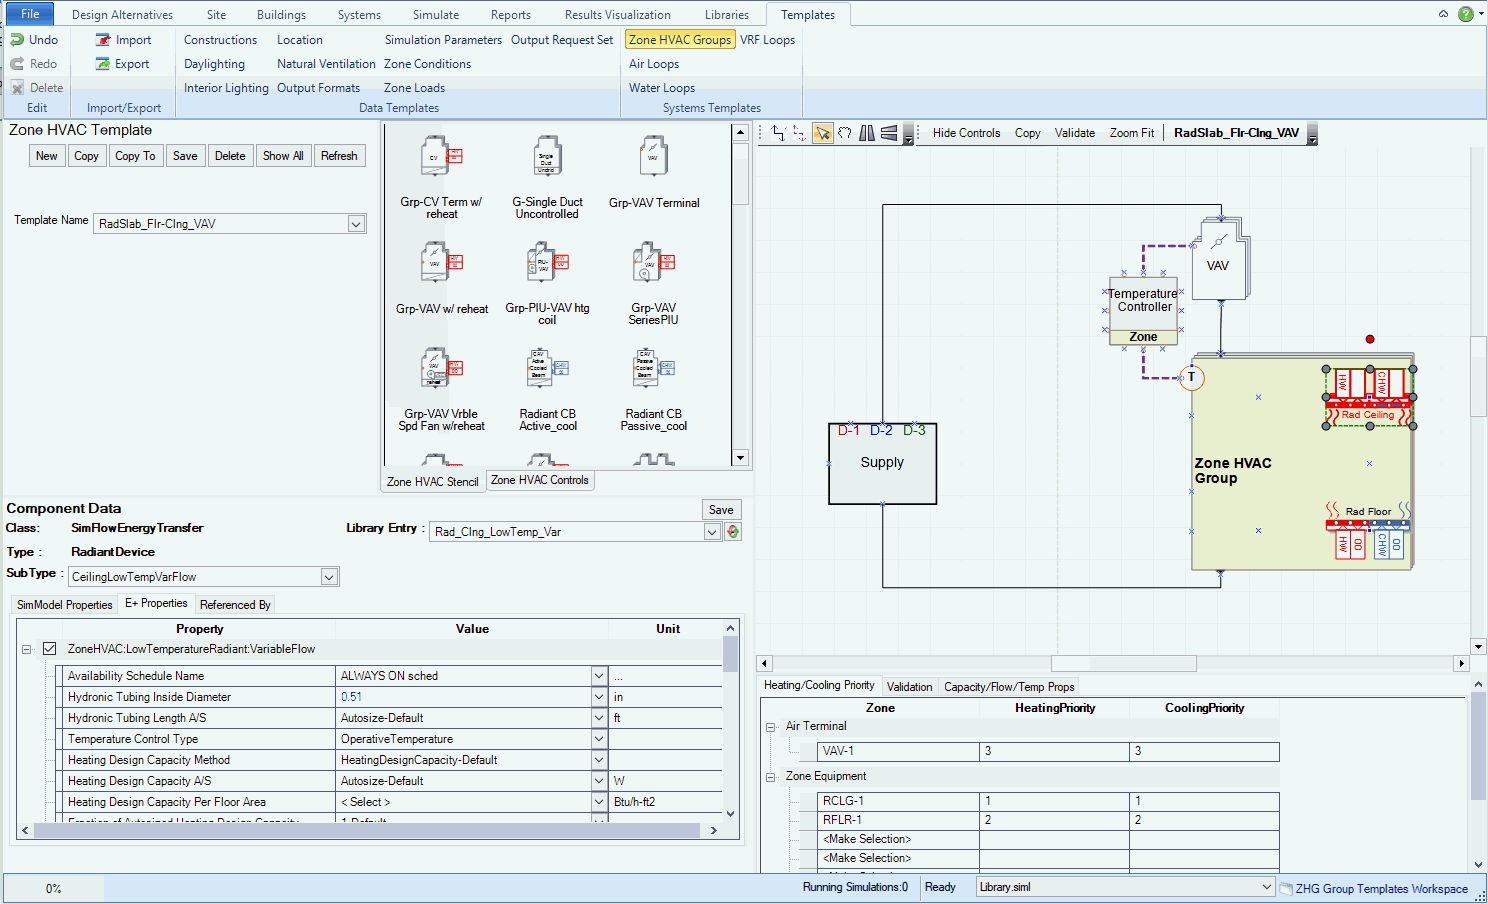
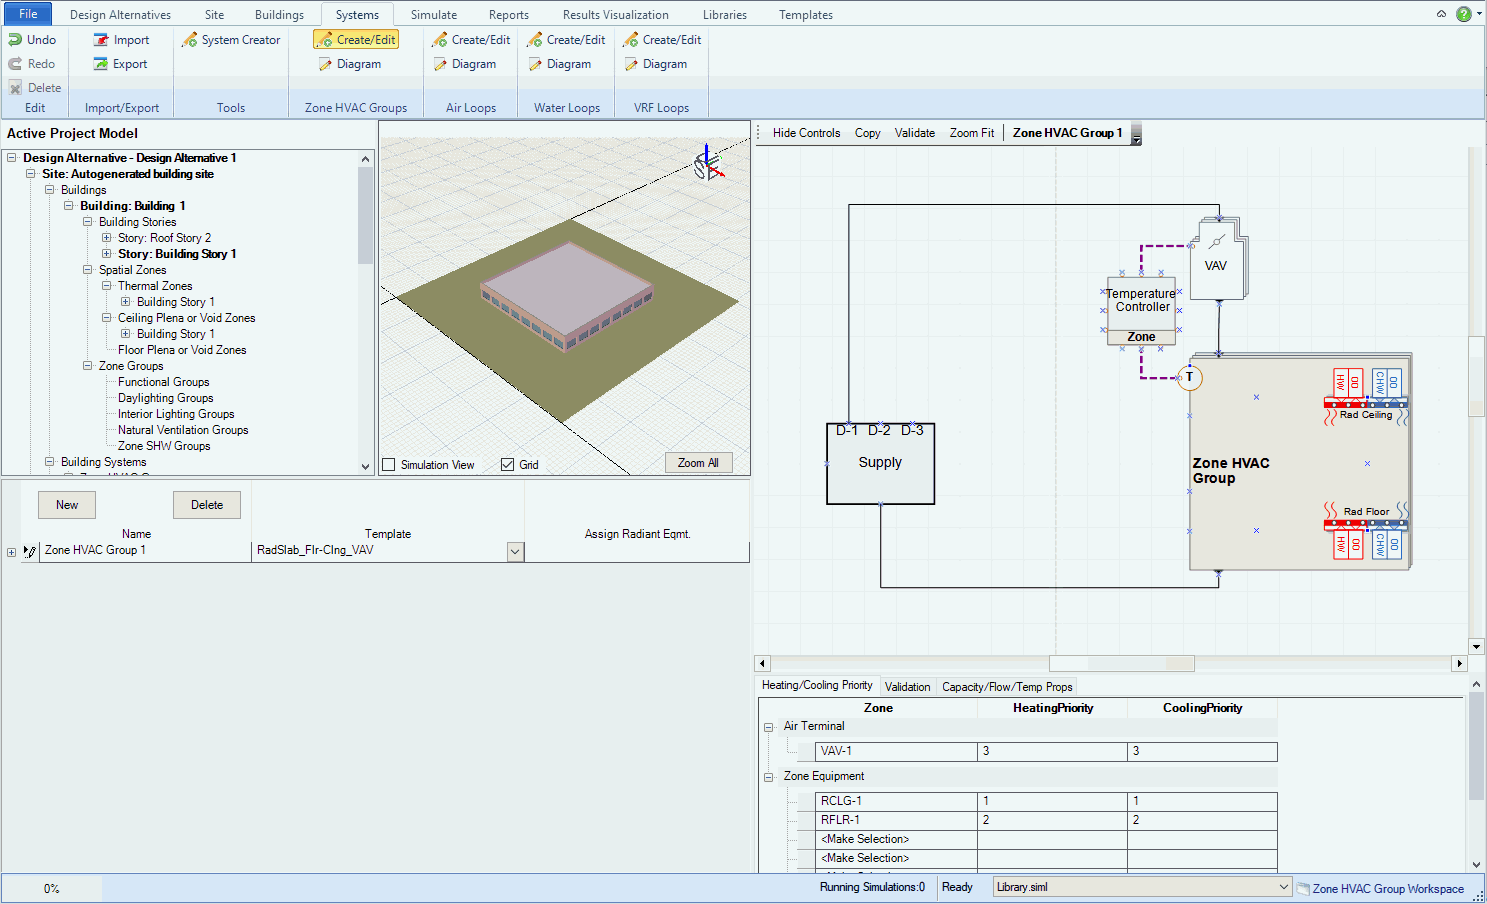
- Zone HVAC Groups contain zone equipment (ex. radiant floors, radiant ceilings, chilled beams), which also includes air terminal units and supply and return plena.
- Zone HVAC Groups represent a single thermal zone or a set of thermal zones.
- Within Zone HVAC Groups the user can work with the set of thermal zones or with individual zones (which is the case in this example)
- Zone HVAC Groups establish the composition of the demand side for the Air Loop
In Simergy the Zone HVAC Groups section of the ribbon within the Systems tab is where this can be accomplished.
Tip: By default the assignment of surfaces in thermal zones to Zone HVAC Group Equipment is the floor in all cases. So, if the user has Radiant Floor Panels as the only Zone Equipment within the Zone HVAC Group, then they can bypass the steps outlined below.
Note: Now the Zone HVAC Group Template has been saved to the Source Library and is available for selection within the drop down lists in other workspaces.


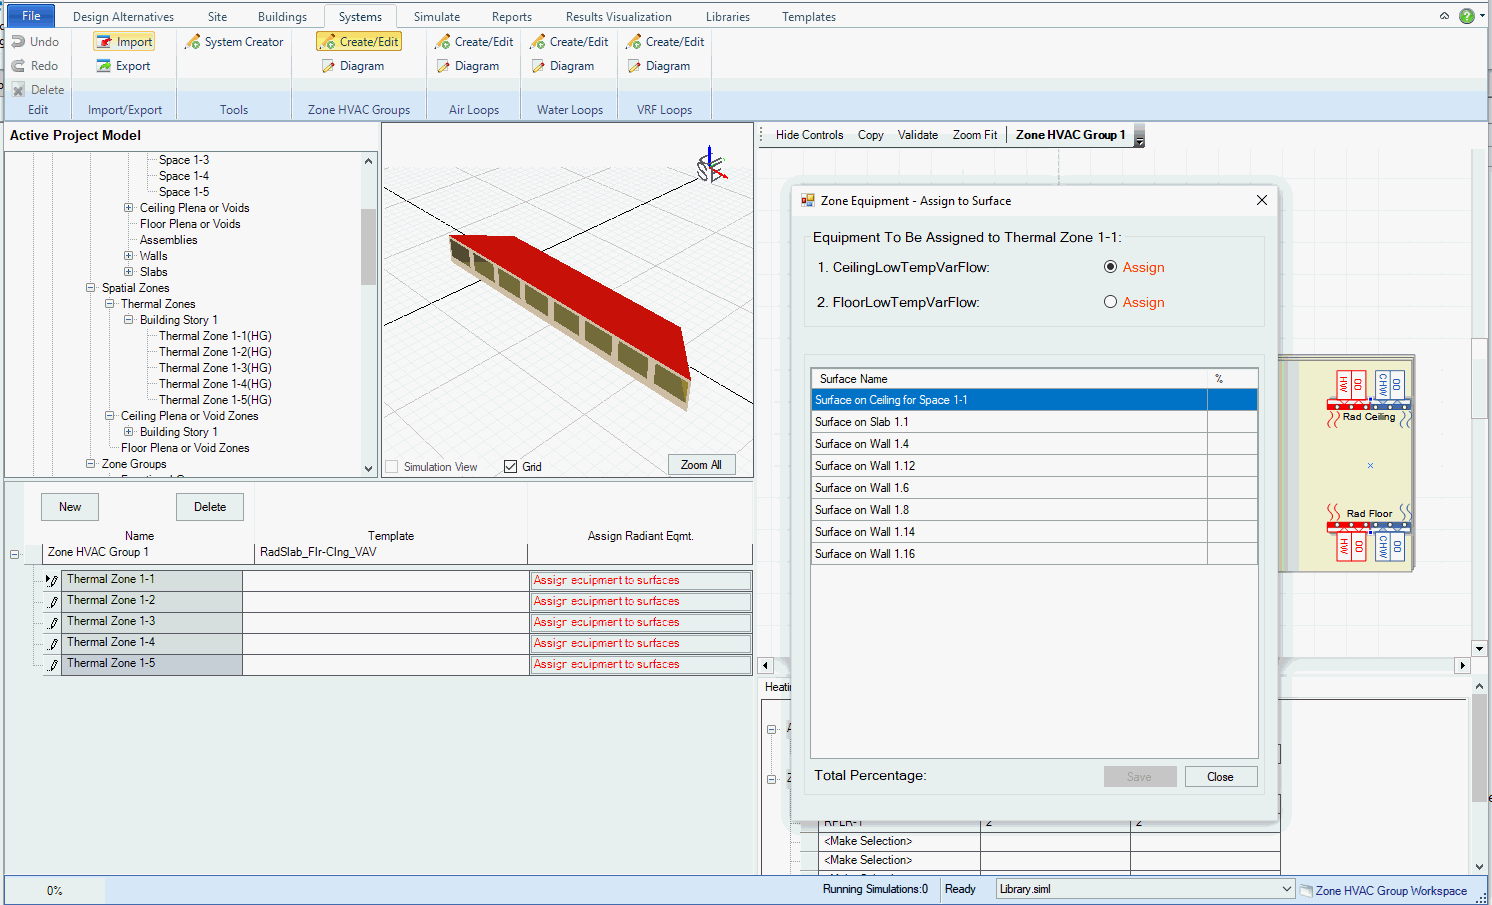
A Zone Equipment - Assign to Surface dialog box appears and we have two options for Equipment to be Assigned. The Surface Names listed correspond to each surface for Thermal Zone 1. Let's start with the Radiant Floor Panel.
Note: That thermal zone is a Donut shape? The image shows that once the Assign equipment to surfaces button was selected Thermal Zone 1 is now shown in isolation within the 3D view. In this scenario the zone configuration selected when the geometry for the building was created was two zones per floor, so a single perimeter zone of a specified depth will circle the core zone on the interior.
Tip: Select on different surface name rows. See how the 3d view updates to show the selected surface in the table.
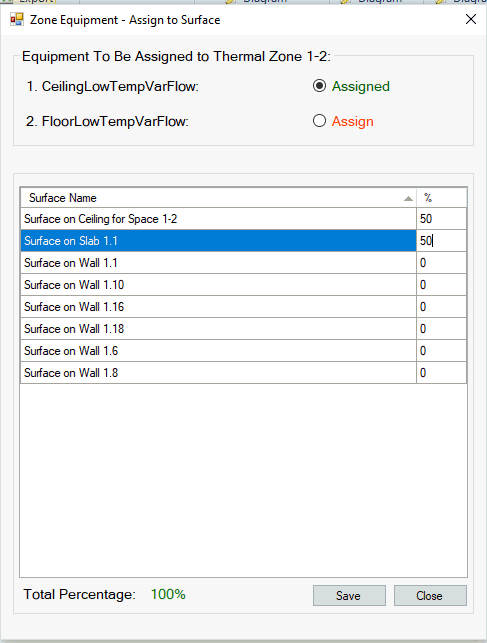
We are selecting surfaces for the Radiant Floor Panel, which in this case will be the two rows called "Floor Slab for Floor 1". Since 100% of the Radiant Floor Panel energy is going to be associated with these two surfaces, we highlight each and enter 50 for each row. Not until we enter 50 in the second row does the Save button became active.
Note: Values totaling 100% must be entered before the assignments can be saved.
Note: If the user doesn't select Save, the information has not been assigned to the surface(s).

Tip: Select on different surface name rows. See how the 3d view updates to show the selected surface in the table.
When the user goes back to the Zone Equipment - Assign to Surface dialog box they will see that the Radiant Floor Panel designation on the button has changed from "Assign" to "Assigned".
We are selecting surfaces for the Radiant Ceiling Panel, which in this case will be the two rows called "Floor Slab for Floor 2". Since 100% of the Radiant Ceiling Panel energy is going to be associated with these two surfaces, we highlight each and enter 50 for each row. Not until we enter 50 in the second row does the Save button became active.
Note: Values totaling 100% must be entered before the assignments can be saved.

Note: If the user doesn't select Save, the information has not been assigned to the surface(s).
Now the surfaces have been assigned to the appropriate Zone HVAC Group equipment. If the user looks to the Assign row in the Zone HVAC Group Configuration table they will see that "Equipment Assigned" is now displayed indicating that surfaces have been assigned for this thermal zone.

Note: Currently in Simergy the user is not able to Assign Zone HVAC Group Equipment to surfaces in multiple thermal zones at the same time.
______________________________________________________________________________________
© Copyright 2013 Simergy, Sustainable IQ, Inc.